The Lean Green Bean

Wednesday, September 29, 2010

Stuffed Acorn Squash

 Hi Friends-

Today I had one of those 5 o'clocks...you know the kind- you get home from work/school/whatever and you're hungry, cranky, and have a headache but you're SO tired that all you can even THINK about doing is taking a nap. Generally when I'm kinda tired and want to relax I'll read a book or turn on the tv...but sometimes I'm just so tired that I don't even want to turn on the TV because I know some stupid show will catch attention and keep me awake when all I really want to do is sleep!

So I faceplanted into bed for an hour. And then I felt much better :) The plan for dinner was supposed to be to make Squash and Chickpea Curry...but a) we have a lot of leftovers in the fridge and b) for some reason, I couldn't get stuffed acorn squash out of my head. But I was also craving sweet potatoes. So then I thought, would it be weird to stuff squash with sweet potato? Hmmm....anyways, I revisited the two stuffed squash recipes I'd found lately and neither of them was getting me excited enough to jump up off the couch and start cooking. So I thought I'd just wing it. Here's what I came up with:


Take an acorn squash and stab it with a sharp knife all over (this is very fun! but be careful!). Put it in the microwave for 2 minutes. Take it out and cut it in half vertically.


Scoop out the seeds and then place the halves face down in a microwave safe dish with a little water on the bottom. Cover the dish with saran wrap and microwave for 5 more minutes.


While the squash is cooking away...dice up some veggies. I used a sweet potato (Side note: the sweet potato is one of the healthiest vegetables you can eat and if you leave the skin on, it has more fiber than oatmeal. I've always peeled my sweet potatoes, except when using them for chips, so I wasn't quite sure how it would be if I left it on in this dish. As a compromise, I peeled part of it and left part of the skin on...you know, to ease into it. I couldn't even tell it was still on there when I was eating it...so I will no longer be peeling my sweet potatoes)


Anyways, I diced up a sweet potato, 1/2 an onion, 2 cloves of garlic, a few mushrooms, 1/2 a zucchini and a small apple After sauteing them for a few minutes, I added some veggie broth and let them keep cooking:


As they cooked, I seasoned them with cayenne pepper, paprika, a little bit of cumin and a dash of cinnamon! When the sweet potatoes were almost tender, I added some quinoa:


Stir it all together and scoop it into the squash halves:


Into the oven they go for 15 minutes at 350 degrees. Then top with a little Parmesan cheese, if you'd like, scoop a little of the squash and a little of the filling onto your fork and dig in!!


Not to toot my own horn or anything, but this was probably the best thing I've made in a while ;)


In other news:

Do you buy organic fruits and vegetables? Check out these lists to see which ones are worth spending your money on and where you can save money:
The Dirty Dozen & The Clean Fifteen

You can even print out a little wallet sized card to take to the store with you! This list gets updated every year so make sure to keep yours current!

Enjoy!
--Lindsay--

Facebook Love

Hi Guys!


I created a facebook page for The Lean Green Bean. I'm hoping that I can start posting my recipe links for the blog on that page so they're all together and easy to find, instead of being mixed in with my personal facebook stuff. Not totally sure if it's going to work or not, but I think if you "like" the page, the links should show up in your news feed just like they do now. Please bear with me as I try to figure it all out and don't forget to "LIKE" my page!

Enjoy!
--Lindsay--

Tuesday, September 28, 2010

Rotel Skillet

Good Evening!

Here's another quick and easy recipe from our days of apartment living. We threw it together once when my mom was visiting and it quickly became a staple. However, I haven't made it in a while because we never seem to buy yellow rice and the kind that we always use is kinda high in sodium...I'm sure you could make this with white or brown rice but I have yet to deviate from this particular yellow kind.


Here's what you do:
Look for this lovely yellow package in the rice aisle of your grocery store. We used to buy it at Wal-Mart but I recently saw it at Meijer, which is part of what inspired me to make this dish! It's yellow rice with saffron. Good stuff.


To begin, cook the rice per the instructions on the package. While it's cooking, chop and saute an small onion and some garlic in a pan. Add some diced chicken and cook until the chicken is 165 degrees.


Drain off any juice from the pan and stir in a can of rotel (to cut down on sodium you could use fresh tomatoes or canned no-salt-added tomatoes and a fresh jalapeno). Also add some black beans and heat through.


When the rice is done cooking, add it to the skillet with the chicken. Also add a handful of mexican cheese and stir to combine until the cheese melts.


Plate and serve!


Also, I'm well aware that there are several names that would be much better suited for this dish than Rotel Skillet....but that's what we call it, so i'm passing it on to you :) This dish can also be made with whole chicken breasts instead of dicing them, or with pork chops.


In other news, another blog I read does a section on things she has bookmarked recently and I really liked the idea so I thought I would do the same for you. Here's some things I'm looking forward to trying:

Two stuffed squash recipes- one with meat and one without:
Stuffed Acorn Squash
Stuffed Acorn Squash with Turkey from Angela at Eat, Spin, Run, Repeat

Pumpkin Spice Latte from Adrianna at A Cozy Kitchen....if this really tastes like Starbucks, that would be AMAZING!

Stuffing Cups from Jessica at How Sweet It Is

Homemade Soft Pretzels from Jessica at The Novice Chef Blog

Sweet Potato Muffins also from Jessica  at How Sweet  It Is

Enjoy!
--Lindsay--

Monday, September 27, 2010

Reader Request: Cabbage Rolls

Hi Friends!

On this day two years ago, I was getting married. Today I spent the day doing schoolwork and sitting in class...it was terribly boring and I spent a lot of time thinking about that magical day two years ago. Seems like it's been forever!


Since Monday's are usually my longest days, and our anniversary just happened to fall on a Monday, and we already had a celebratory dinner in NYC, I turned to my crockpot. My mother-in-law provided my second reader request!! Another recipe from A Year of Slow Cooking: Crockpot Cabbage Rolls. Since cabbage rolls happen to be one of the hubby's favorite foods, and I NEVER make them for him, I thought today would be the perfect day to try out this recipe! Turns out that as a Happy Anniversary to me present, for some unknown reason, my classes were canceled this morning so I did have to drive in the rain...I got to turn around, come home and go back to bed for a bit! THEN...at lunch, the hubby came home with these for me:

Note those delicious peanut butter M&M's down there on the counter...MY FAV!! In return, I gave him some beer in large cans. For some reason, he insists it tastes better that way :)

So on to the cabbage rolls:

Ingredients
--1 head of cabbage
--1 egg
--1 8oz can tomato sauce
--1/2 cup uncooked brown rice (I used more like 2/3 cup because it seemed like the right thing to do)
--1 envelope onion soup mix (I've never used this before. It looked weird when I poured it in the bowl...I just went with it)
--1 lb lean ground turkey
--1/3 cup shredded parmesan cheese
--2 cups V8 juice

The Directions.
--Core your cabbage, and save it for the guinea pigs (Quite honestly I never use cabbage. I dislike most everything about it...so I wasn't really sure how to core it. I just cut off the bottom stem part and then kept cutting off more of it as I peeled leaves off and more was exposed)

--Very carefully, peel off large cabbage leaves and wash them. (This is easier said then done. After I cut off the end, I put the cabbage in a pot with some water, covered it and steamed it for a few minutes. For every few minutes of steaming, I was able to peel off one, maybe two leaves. It was kinda tedious and you have to go very slowly so you don't rip them...but I got the hang of it eventually.)


--In a mixing bowl, combine the turkey meat, raw rice, the egg, the onion soup mix, the cheese, and the can of tomato sauce. Mix well---the mixture will be like very gloppy meatloaf. 

--Using a spoon, scoop about 1/3 of a cup of mixture into each cabbage leaf and roll or fold. Put the stuffed cabbage leaves into the bottom of your crockpot, seam side down. (I didn't really measure, I just filled it until it looked like a reasonable portion size. They were surprisingly easy to roll up burrito style)


It's okay to stack the rolls on top of each other in the crock.Top with 2 cups of V8 Juice.

Cover crock and cook on low for 6-8 hours.

The result? A crockpot succcess. Similar to the cornbread recipe, and like most cooking endeavors,  this will take some experimenting to get the timing right. The times given on blog this recipe came from seem to be running a bit too long for my crockpot. The hubby said the flavor was great but that the cabbage wasn't as crunchy as when they're baked in the oven...this is probably due to both the long cooking time and the fact that it was done in a crockpot. I cooked them for 6.5 hours and the leaves got a little brown...ok black:


But most of them were fine...and for the two on the edges, the filling was just fine so we just discarded the leaves.


Overall, this is a good recipe. When I make them again, I will probably only cook them for 4-5 hours and I think they'll still be fine. Another option would be lining the bottom of the pot with some extra cabbage leaves so those brown instead of your rolls!
Give them a try and keep the reader requests coming!

Enjoy!
--Lindsay--

Sunday, September 26, 2010

Eggplant Parmesan

Allow me to share a little secret with you...I'm slightly OCD. Last time I went to the grocery store, I bought a new box of panko breadcrumbs...because I thought mine was almost gone. ERRONEOUS! It was, in fact, still half full. So for the past few weeks, I have had this extra box of panko taking up space in my pantry. To most people, this would not be a big deal. But like I said, I'm kind of OCD...and it turns out that the shelf which has been designated for the panko is pretty full. Since I couldn't trade out my new box for an empty box, I was forced to put the new box in front of the old..and it has been totally messing with my chi. It's been sticking out at an awkward angle and making my shelf look unorganized. Side note...there is plenty of space on the other shelves in the pantry but do you think I could move the extra box down there? No! Because that's not where it goes. Anyways, the whole purpose of me sharing with you was to provide adequate background information so when I told you that I finally used up the old box of panko, you could get adequately excited! And let me tell you...I was PUMPED! In fact, using up the rest of the box of panko may or may not have been the sole motivating factor for me making this dish tonight.

As you may remember, eggplant parmesan has been on my list of things to try. It was on the menu for this week and although it was a day late...I gave it a whirl. I wasn't really sure if I was going to like it and I was fairly certain the hubby wasn't too excited about it, so I made a 1/2 batch. A taste test we'll call it.


Aren't eggplants beautiful? I love looking at them :)

Here's what I did:

Slice an eggplant into semi-thick slices...about 1/2 -3/4 inch thick. Place them in a colander, sprinkle with salt and let them sit for an hour.


In a shallow dish, mix some panko (or regular) breadcrumbs, some italian seasoning and some grated parmesan cheese. In another dish, separate out two egg whites. Rinse the slices and pat them dry. Dip the slices in the egg whites, then in the crumb mixture and place them in a greased baking dish:


Bake at 350 degrees for 15-20 minutes, flip the slices over and bake for another 15 minutes or until slices are tender and easily pierced with a fork.

Top each slice with a spoonful of ricotta cheese:


Add some spaghetti sauce:


And of course some mozzerella cheese:


If you have any extra breadcrumbs you can throw those on top also. Return to the oven for 15 minutes until the cheese is melted


The result? Pretty good! I think the ricotta is a good addition. I'm not sure I would have liked it as much without it.

Enjoy!
--Lindsay--

Pumpkin Chocolate Chip Pancakes

Hi Friends!

Today was recipe club day. The theme of month was brunch--my favorite so far! I'd been craving some pumpkin pancakes so I thought this would be a good excuse to give them a try.
*Original recipe found here


Ingredients:

1 medium egg
1 cup milk
¾ cup unbleached white flour
¾ cup whole wheat flour
½ cup cooked pumpkin
1 tablespoon sugar
2 teaspoons baking powder
¼ teaspoon ground cinnamon
Pinch nutmeg
Pinch powdered ginger


Directions:

1. Combine the dry ingredients in a large mixing bowl. Add the pumpkin and egg and some of the milk.


Stir, then gradually add more milk. You may not need to use it all.


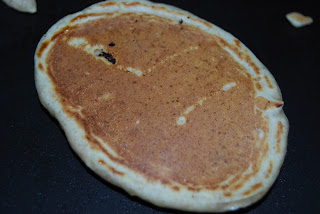
2. Cook them on the griddle :) I add a couple chocolate chips once they on the griddle.


3. Enjoy! I really liked these. I like that they use whole wheat flour. And the pumpkin makes them a great, healthy start to the morning. I double the recipe and it made a ton! In fact, I ate them for dinner tonight and they're in the lunchbox for tomorrow :)


Enjoy!
--Lindsay--