Chocolate Oreo Cake
Up until a a few weeks ago, any time I made a cake, it was in a 9x13 rectangular pan. Last month, I gave the stacked, circle cakes a whirl and now I'm hooked. It was way more exciting and not much harder. So yesterday, when I was thinking about what to make for our dinner party dessert, I found I found this at Can You Stay For Dinner. Pumpkin spice cake. I wasn't even so sure that was the flavor I wanted to make, but I quickly become obsessed with wanting to make a cake that LOOKED like that. With the layers, and the piping...it was just so beautiful.
Now I personally love pumpkin cake...pumpkin anything really...but I wasn't sure how big of a hit it would be with the masses, so I opted for plain old chocolate so that I could be sure my hubby would eat the leftovers. I'm here to teach you how to make a fancy looking cake, in a simple way.
Step one: Buy a boxed cake mix and some frosting. I forgot to take a picture, but I used this kind of cake mix:
I also bought two containers of frosting:
Bake the cakes according to the directions. I won't insult your intelligence with a picture tutorial :) I was a little surprised, however, when I opened my oven and they were all puffed up and rounded on top! The last ones I made didn't do that. So I knew I would need to flatten the bottom one so the other cake could sit on top. I let them cool, then used a bread knife to saw off the rounded part.
Next, I prepared my oreos. By prepared I mean put them in a plastic bag and smashed them to pieces.
Spread frosting all over the top of the bottom cake. Don't worry if they crumbs show through, you won't be seeing them. Then sprinkle on a layer of oreos.
Next, plop the other cake on top...keep away from inquiring noses.
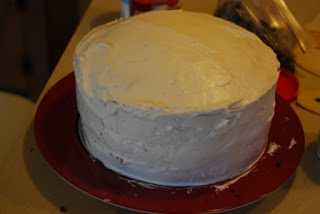
Use a knife or other fancy tool to spread frosting all around the sides...don't go onto the top yet! Again, don't worry too much about crumbs because they'll be covered. When you've frosted all the way around, THEN open a new jar of frosting and very carefully frost the top. Don't skimp on the frosting or some crumbs will show through. Be careful around the edges.
Once it's all frosted, use your hands to press oreo crumbs all around the sides. Be careful not to get any on the top!
I let the extra crumbs fall to the bottom because they covered up some of the frosting that got on the plate. Finally, since I didn't have piping tools or skills, I opted for dark chocolate chips. Carefully press them around the top edge of the cake. You may not believe me, but when I dumped some chocolate chips out onto the counter to do this part, it ended up being the exact number I needed!
Once the chips are in place, you can go back and press some more oreos into the blank spots near the top of the edges if you want.
Cut and serve!
Enjoy!
--Lindsay--


5 Comments:
Gotta love those oreos and all their uses!! Nice work and thanks for sharing.
Thank you!!! It pales in comparison to all the amazing cakes you make....but it will do for me :)
Great step by step and the outcome is gorgeous! I bet your guests were owing and awing! Beautius work. And I can't wait to see your thanksgiving jello
YUM! That looks so good and pretty! Nice job!
Thank you! My husband says he doesn't like the Oreos in the middle because they get soggy...I told him they looked good so I don't care :)
Post a Comment
Subscribe to Post Comments [Atom]
<< Home